

Start building a workflow
Every workflow in Sender starts with one trigger and then moves each subscriber through the steps you add below it. This guide shows you how to build one from scratch, using a welcome workflow as the example.
You’ll set up a trigger, add a welcome email, then extend the workflow with a delay, a condition and an action that sorts engaged subscribers into their own group. New to automations? Read Creating Your First Automation for a quick overview first.
How a workflow is built
A workflow has two parts: the trigger that lets subscribers in, and the steps they move through in order. When a subscriber completes one step, they continue to the next.
You can add six types of steps:
- Email – sends an email to the subscriber. You create each workflow email inside the workflow itself.
- SMS – sends a text message.
- Delay – waits a set amount of time before the next step.
- Condition – splits the workflow into Yes and No paths based on subscriber data or activity.
- Action – changes group membership or subscriber fields, notifies you, or sends a webhook.
- Split – A/B tests two email variations to see which performs better.
For details on each one, see Understand automation steps.
Before you start
Have these ready so you can finish the workflow in one sitting:
- A subscriber group for new signups. The trigger watches this group. See Subscribers & Segmentation to create one.
- A way for people to join it, such as a signup form connected to that group. See Signup forms & popups.
- A sender name and email address. Replies to your welcome email go to this address.
Where to find this feature
In the Sender dashboard, click Automations in the left sidebar.
Steps to build your workflow
Step 1 — Start a new workflow from scratch
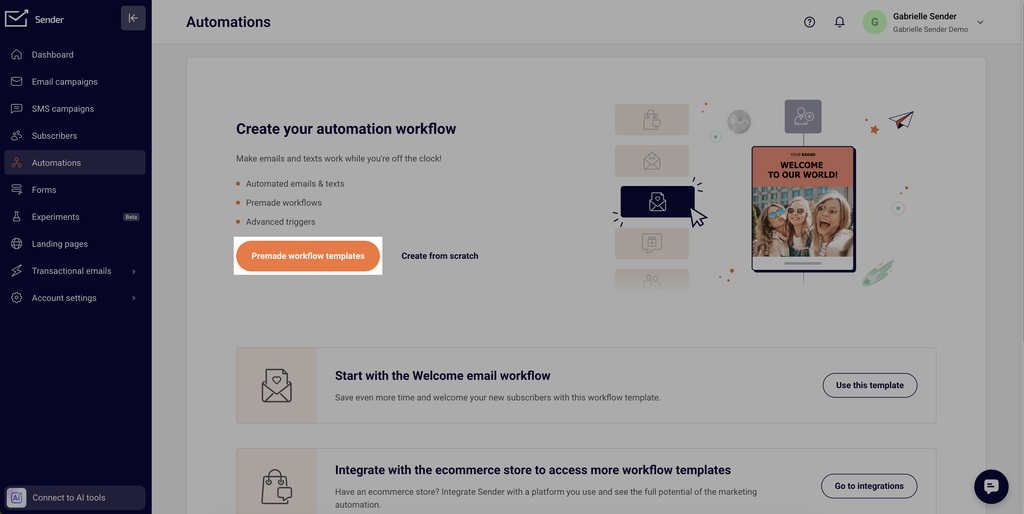
- On the Automations page, click Create new workflow in the top right corner.
- In the window that opens, select Create from scratch.
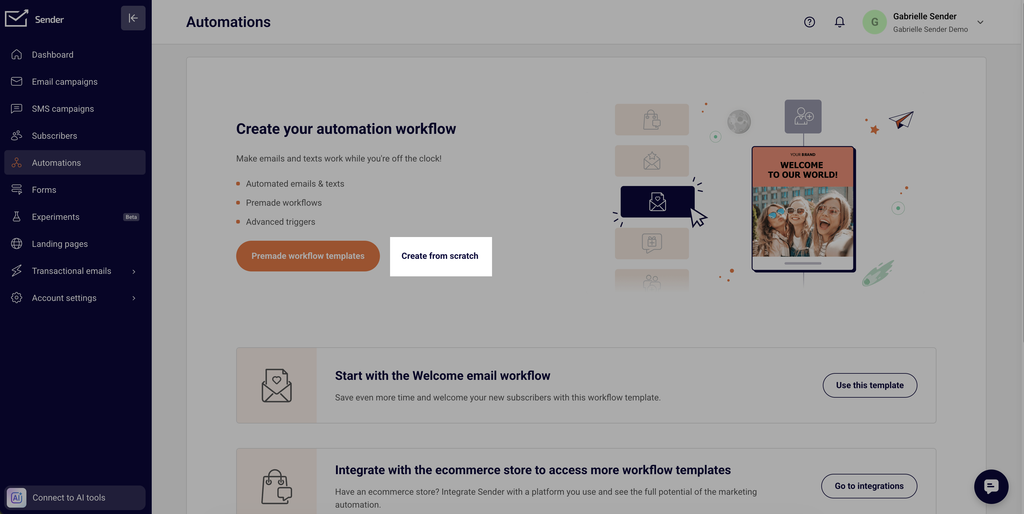
Want a head start instead? The same window offers ready-made templates grouped by goal, such as Welcome, Onboarding and Win-back customers. This guide builds from scratch so you see every step.
Step 2 — Choose a trigger and name the workflow
The next screen lists every available trigger. For a welcome workflow, you want subscribers to enter the moment they sign up.
- Find Subscriber joins a group and click Create automation on it.
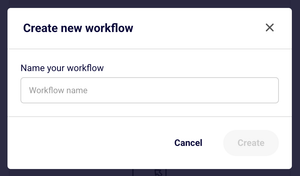
- In the popup, enter a name you’ll recognize later, such as “Welcome – Newsletter signups”.
- Click Create. The visual workflow builder opens.
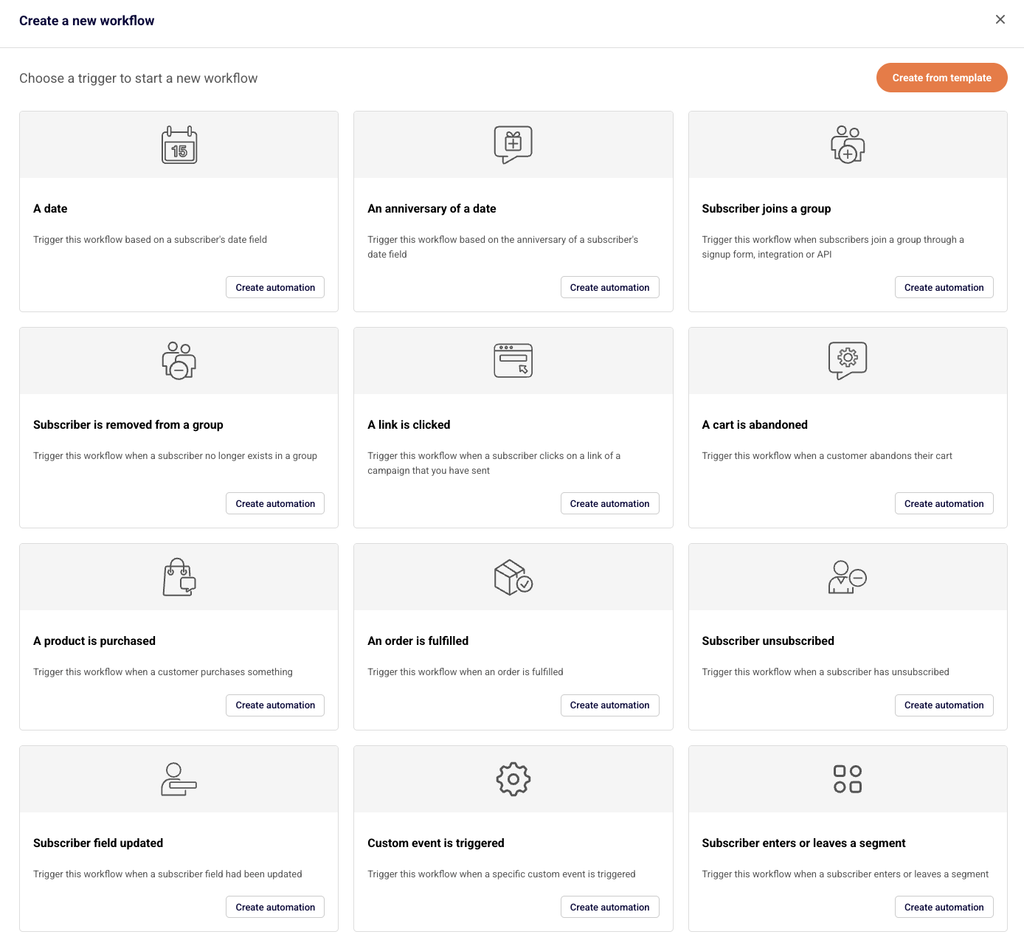
Other triggers start workflows from dates, anniversaries, link clicks, unsubscribes, field updates, and ecommerce events like abandoned carts and purchases. See Choose a starting trigger for the full list.
Step 3 — Set up the trigger
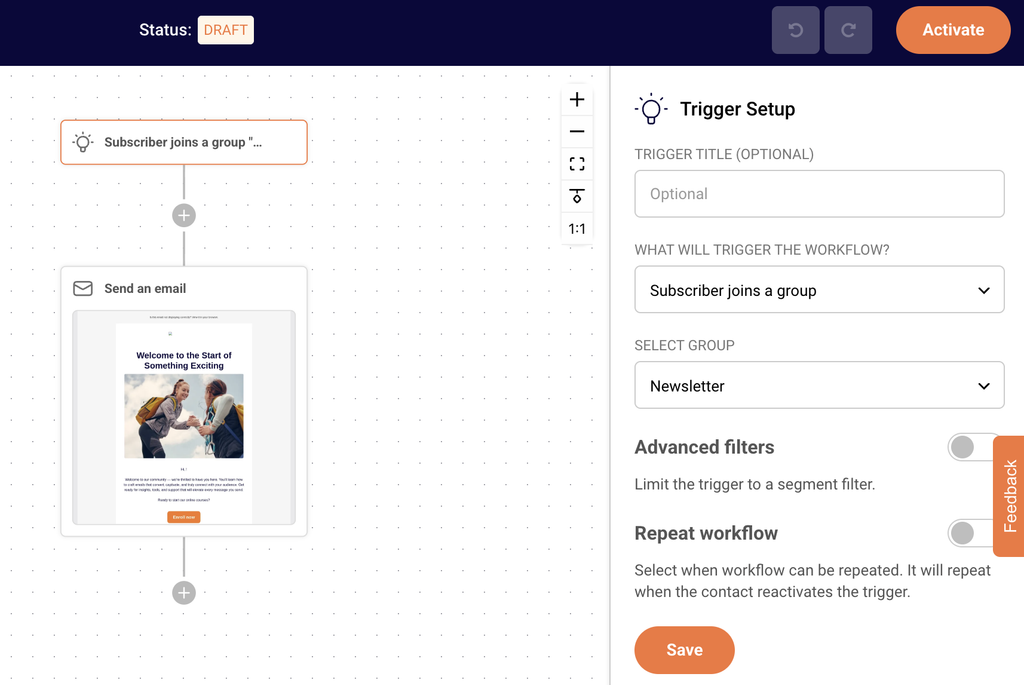
The builder shows your trigger block at the top of the canvas and the Trigger Setup panel on the right.
- Open the SELECT GROUP dropdown and choose the group new subscribers join (for example, “Newsletter”).
- Leave the Repeat workflow toggle off so each subscriber receives the welcome email only once. Turn it on only if people should re-enter every time they rejoin the group.
- Click Save.
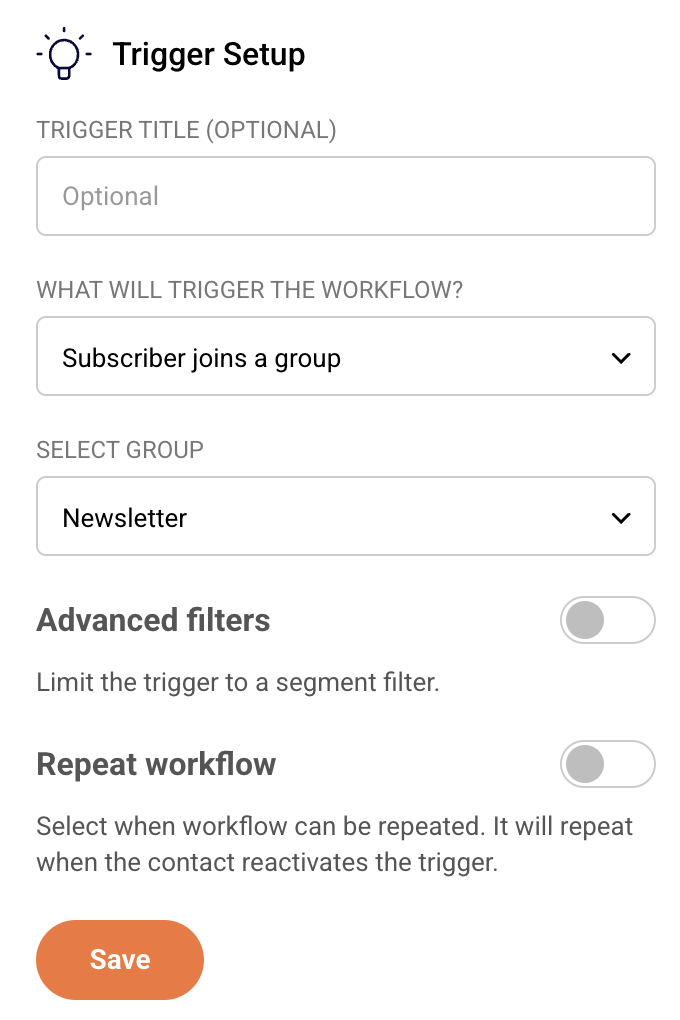
The trigger block updates to show your group, and the Completion counter in the top right moves forward.
For every trigger setting, see Triggers Explained.
Step 4 — Add the welcome email
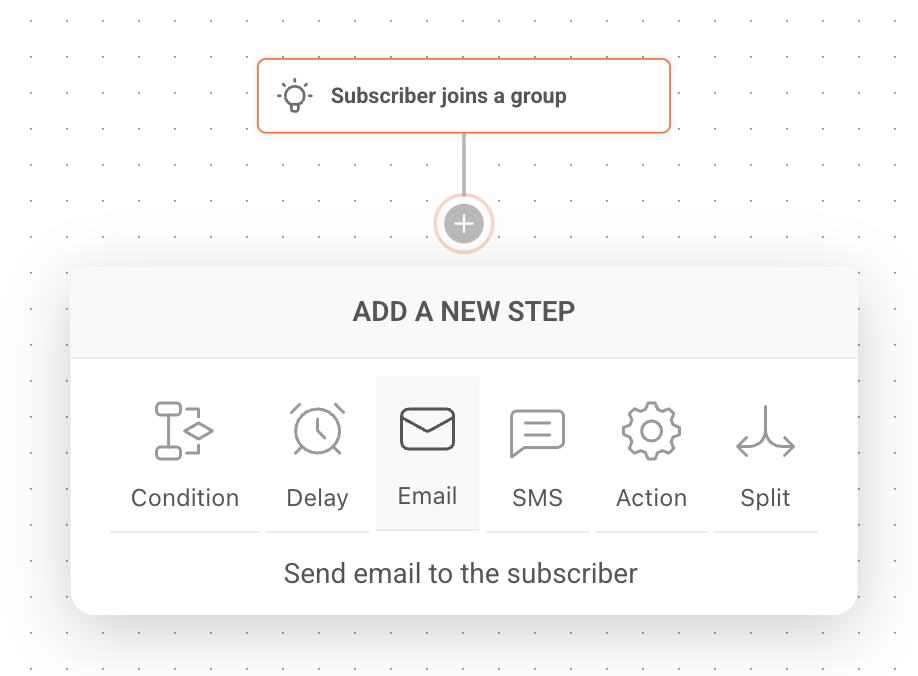
- Click the + icon below the trigger block.
- In the ADD A NEW STEP menu, select Email.
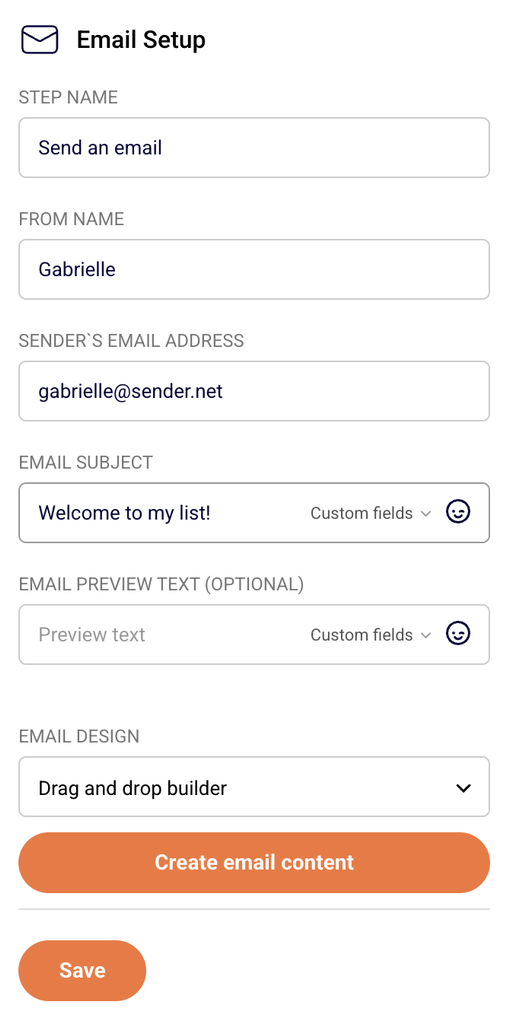
The email settings panel opens on the right. Fill in:
- Email title – an internal name for the step, like “Welcome email”. Subscribers don’t see it.
- From name – the name subscribers see in their inbox, usually your brand.
- Sender’s email address – the address the email comes from. Replies go here too.
- Email subject – the subject line, for example “Welcome! Here’s what to expect”.
- Email preview text (optional) – the short line many inboxes show after the subject.
Step 5 — Design the email
- Click Create email content.
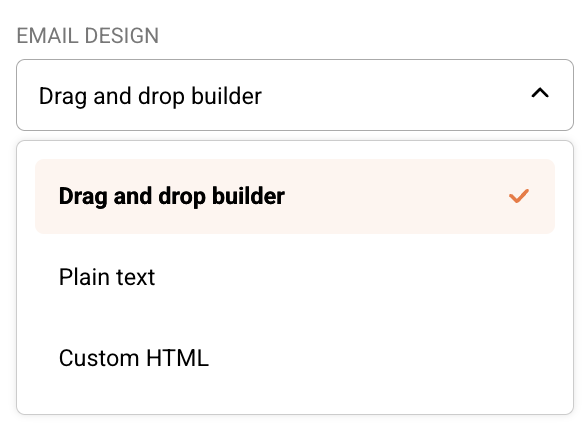
- Choose how to build the email: the drag-and-drop builder, plain text or custom HTML.
- In the drag-and-drop builder, pick a template or start with a blank canvas.
- Add your content with blocks such as headlines, text, images, buttons and social icons.
- Click Save & continue to return to the workflow builder.
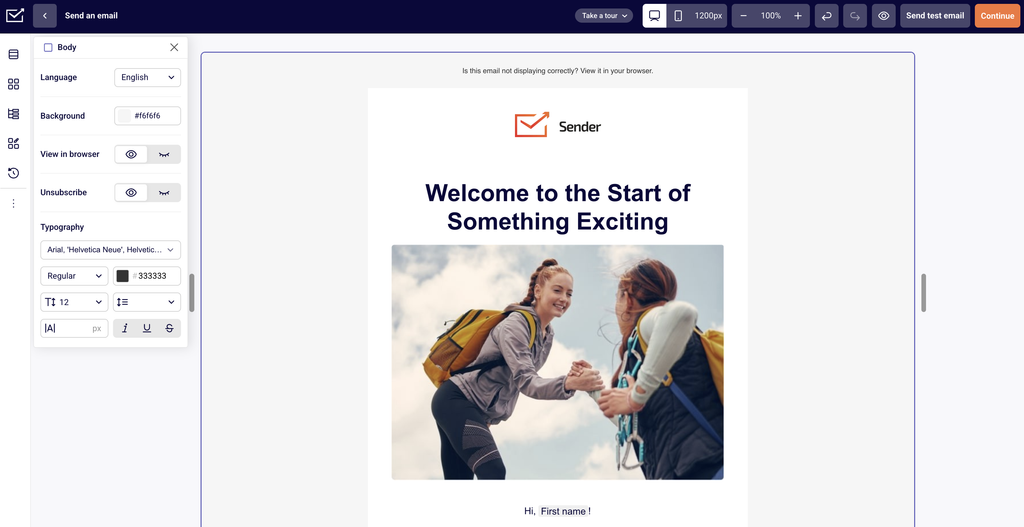
Keep the first email short: thank people for joining, tell them how often you’ll email, and give them one clear next step. For editor details, see Using the drag-and-drop editor. Prefer code? See Use HTML emails in automation or Use plain-text in automation.
You now have a working welcome workflow: a trigger and a finished email. You can jump to Step 7 and activate it, or keep building.
Step 6 — Extend the workflow (optional)
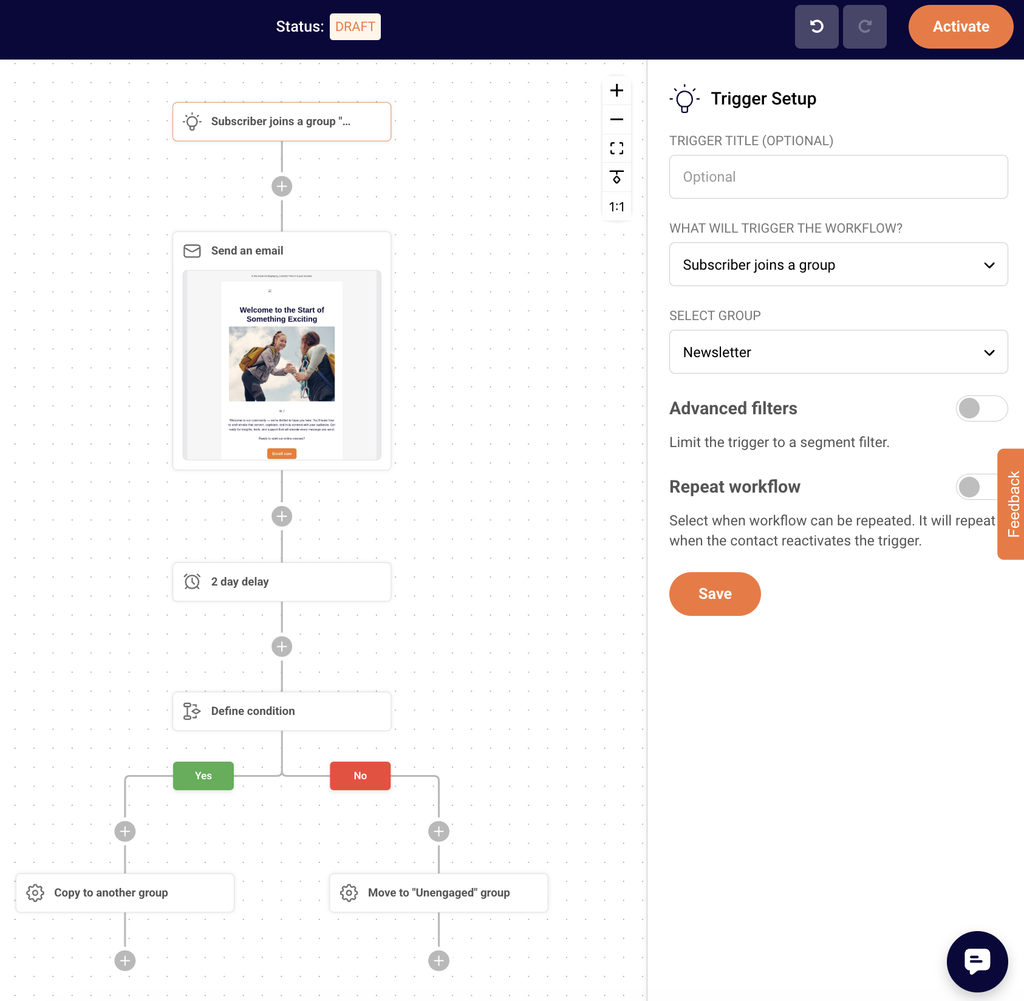
Add steps below the email to react to what subscribers do next. In this example, the workflow waits two days, checks whether the subscriber engaged with the welcome email, and copies engaged subscribers to a separate group.
Add a delay
- Click the + icon below the email step and select Delay.
- In the WAIT FOR dropdown, keep Time delay.
- Enter 2 in the OF field and choose Days from SELECT TIME PERIOD UNIT.
- Click Save. The block on the canvas now reads “Wait 2 Days”.
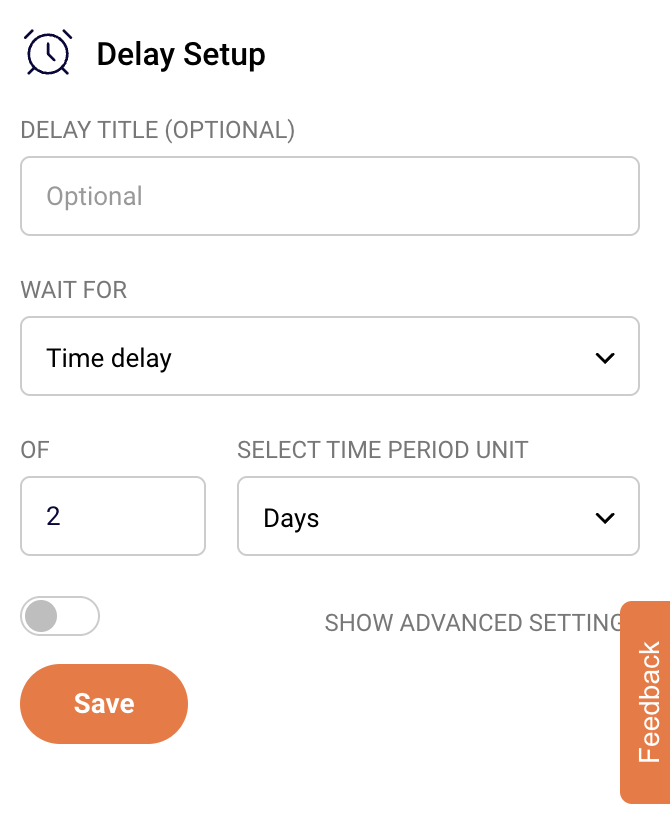
Want the workflow to continue only on certain days or at a set time? Turn on SHOW ADVANCED SETTINGS and choose the days under RESUME FLOW ON and a TIME. See Delays & Timing Rules.
Add a condition
- Click the + icon below the delay and select Condition.
- In WHAT TYPE SHOULD THE CONDITION BE?, choose Workflow email activity.
- Select your welcome email, so the condition checks whether the subscriber engaged with it.
- Click Save. The block splits into a green Yes path and a red No path.
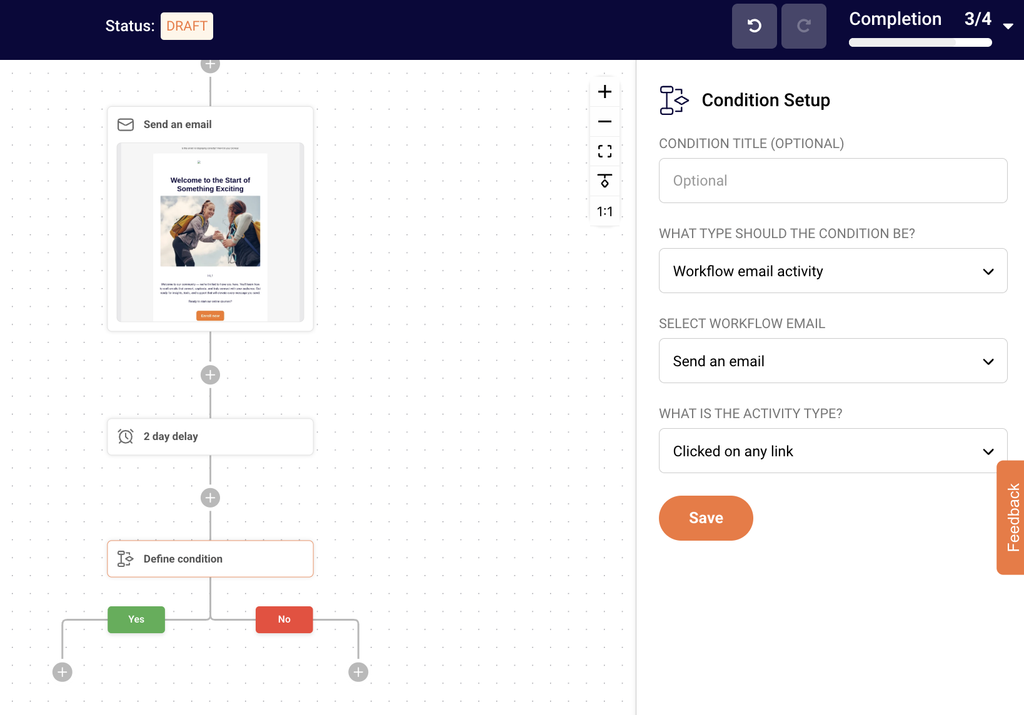
See Conditions & Filters for every condition type and comparison option.
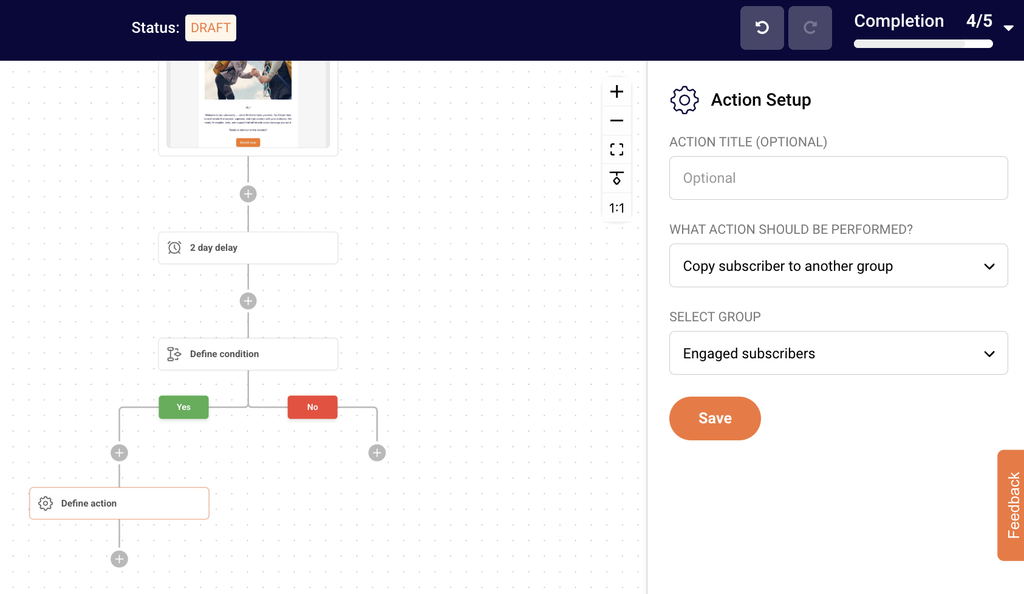
Add an action on the Yes path
- Click the + icon below Yes and select Action.
- Choose Copy subscriber to another group, then pick the group, for example “Engaged subscribers”.
- Click Save.
Choose Move subscriber to another group instead if the subscriber should leave their original group.
The No path is a good place for a follow-up. For example, add a second email with a different subject line for subscribers who missed the first one.
Step 7 — Review and activate
- Check every block on the canvas. A block that reads Define delay or Define condition still needs saving.
- Confirm the Completion indicator in the top right shows full progress.
- Click Activate in the top right corner.
The workflow status changes from DRAFT to ACTIVE, and the workflow starts running for subscribers who match your trigger.
Example: a larger workflow
Once you’re comfortable with the basics, you can build much larger customer journeys. Chain several delays, stack conditions under each branch, mix email and SMS steps, and use actions to keep your groups tidy based on what subscribers do.
Common examples include win-back series for customers who haven’t bought in a while and abandoned cart reminders. Ecommerce triggers such as A cart is abandoned need an active ecommerce integration.
For step-by-step builds, see Build welcome series, Build abandoned cart series and Build post-purchase workflow.
What happens after you activate
Your workflow appears in the Automations list with an ACTIVE badge. From then on, each subscriber who joins the trigger group enters the workflow and moves through the steps in order.
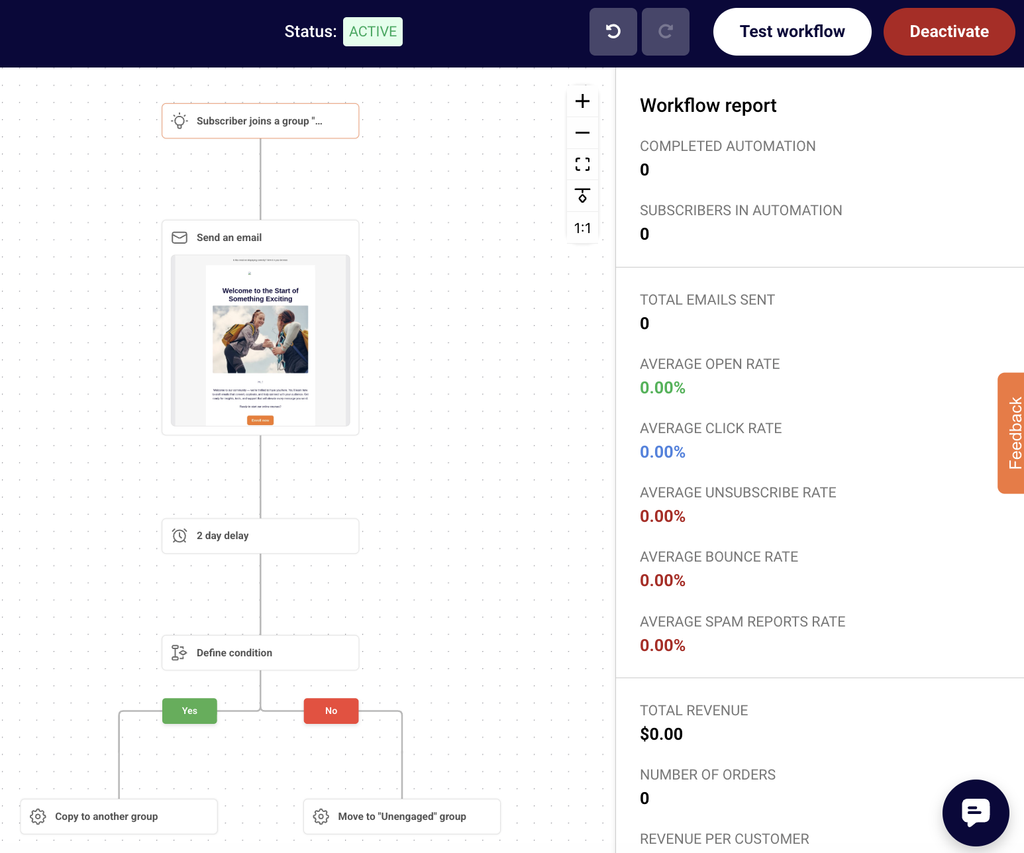
Once the workflow starts sending, you can track emails sent, open rate, click rate and revenue in the Email report panel or with the Full report button. See Automation Performance and Reports.
You can keep editing an active workflow. Changes apply to subscribers who reach those steps after you save. See Editing Live Automations.
Common issues
The workflow won’t activate → You need at least one email step with saved content, and every block must be configured. Look for blocks that still read “Define…” and check the Completion indicator.
The Save button is grayed out → Fill in every required field in the panel. Save becomes active once each dropdown and field has a value.
The email step shows as incomplete → Open the email editor, finish the design and click Save & continue.
Nobody is entering the workflow → Confirm the workflow status is ACTIVE, the right group is selected in the trigger, and new subscribers are actually joining that group, for example through a signup form connected to it.
Emails send at unexpected times → Workflows run on your account’s time zone, so check it in your account settings. If a delay uses advanced settings, check the days under RESUME FLOW ON and the TIME.
FAQs
Can a workflow have more than one trigger? No. Each workflow has a single trigger. To respond to several events, create a separate workflow for each.
Can a subscriber go through the same workflow twice? Only if you turn on Repeat workflow in the trigger settings. With it off, each subscriber enters once.
How do I pause a workflow? Click Deactivate in the top right of the workflow builder. Subscribers already in the workflow finish their sequence. See Pausing and Resuming Automations.
Can I start from a template instead? Yes. After you click Create new workflow, pick a template from categories such as Welcome, Onboarding or Win-back customers, then adjust its steps.
How many workflows can I create? It depends on your plan. See Automation Limits by Plan.
If you get stuck on a specific task or can’t find a way to do something, contact our support team via LiveChat or support@sender.net. We’re here to help 24/7.